API Testing helps test your postman collection or automtion code in restassured or karate. Let’s walkthrough how to do it
Summary
- API testing is a type of software testing that analyzes an application program interface (API) to verify that it fulfills its expected functionality, security, performance and reliability.
- APIs are set of rules and protocols that allow different software applications to communicate and interact with each other.
What is API Test?
- API testing, also known as Application Programming Interface testing, is a type of software testing that focuses on validating the functionality and reliability of APIs (Application Programming Interfaces).
- API testing focuses on analyzing the application’s business logic as well as security and data responses.
Why to use API Test?
- Postman Collections are a group of saved requests. Every request you send in Postman appears under the History tab of the sidebar. On a small scale, reusing requests through the history section is convenient. As your Postman usage grows, it can be time-consuming to find a particular request in your history. Instead of scrolling through your history section, you can save all your requests as a group for easier access.
- With the help of aiTest, user can test this collection with the desired workload provided in the configurations while creating
the tests.
Benefits
The benefits of API testing in aiTest include
- aiTest allows you to perform comprehensive functional testing of your application’s URLs and APIs.
- It helps ensure that all URLs and API endpoints are functioning correctly, validating expected responses, and detecting any functional issues or regressions.
- aiTest facilitates testing the integration and interoperability of your APIs with other systems or third-party services.
How to Create Testrun in API Test?
- Sign up using your E-mail or Google account.
- Go to
API Test
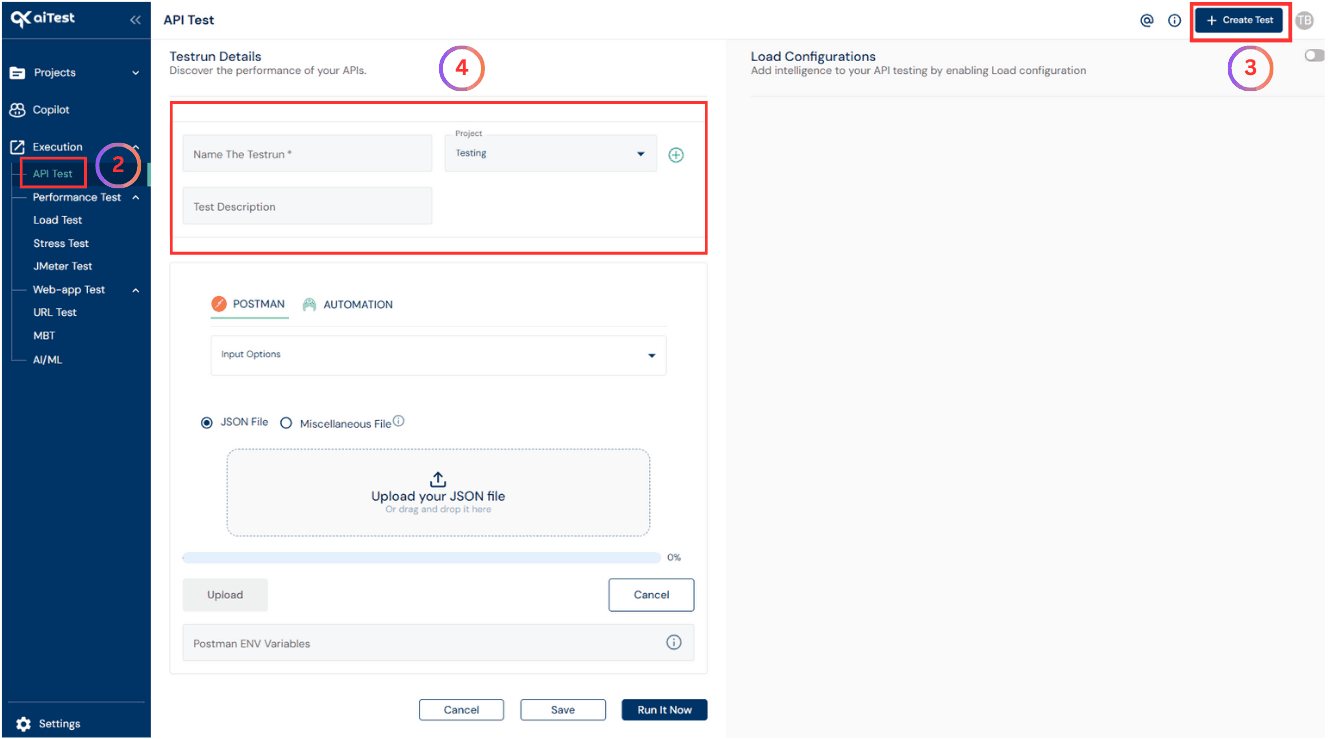
- Hit the Create Test button
- Configure your test
- a)Name the testrun: Give the name of testrun whatever you want or which is related to your application, So that it will be easy to get that particular testrun details whenever you want. i.e. test-example.com, test-demo.com, etc.
- b)Project: Select a project in which you want to run your test or you can create a project by clicking on the red colored plus sign(+) button.
- c)Test Description: Write some testrun description to make your testrun more informative.
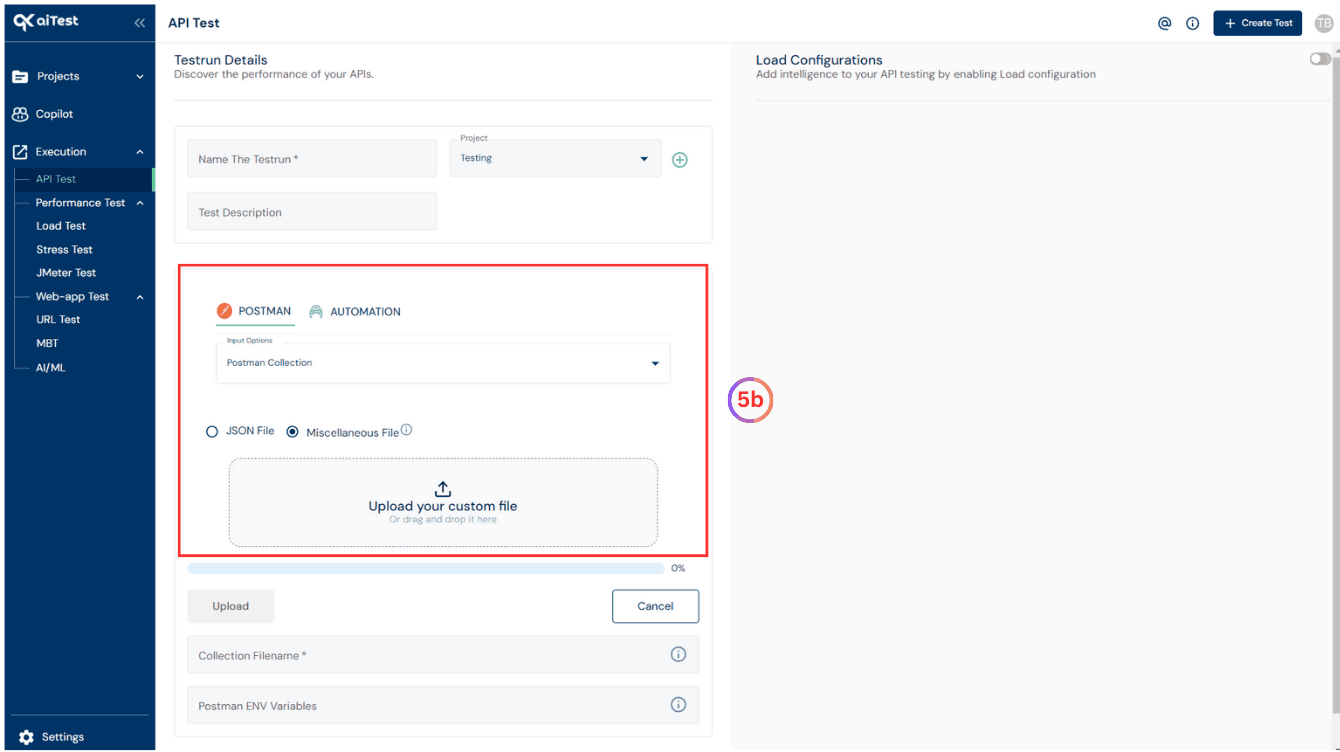
- Now here you can choose POSTMAN or AUTOMATION.
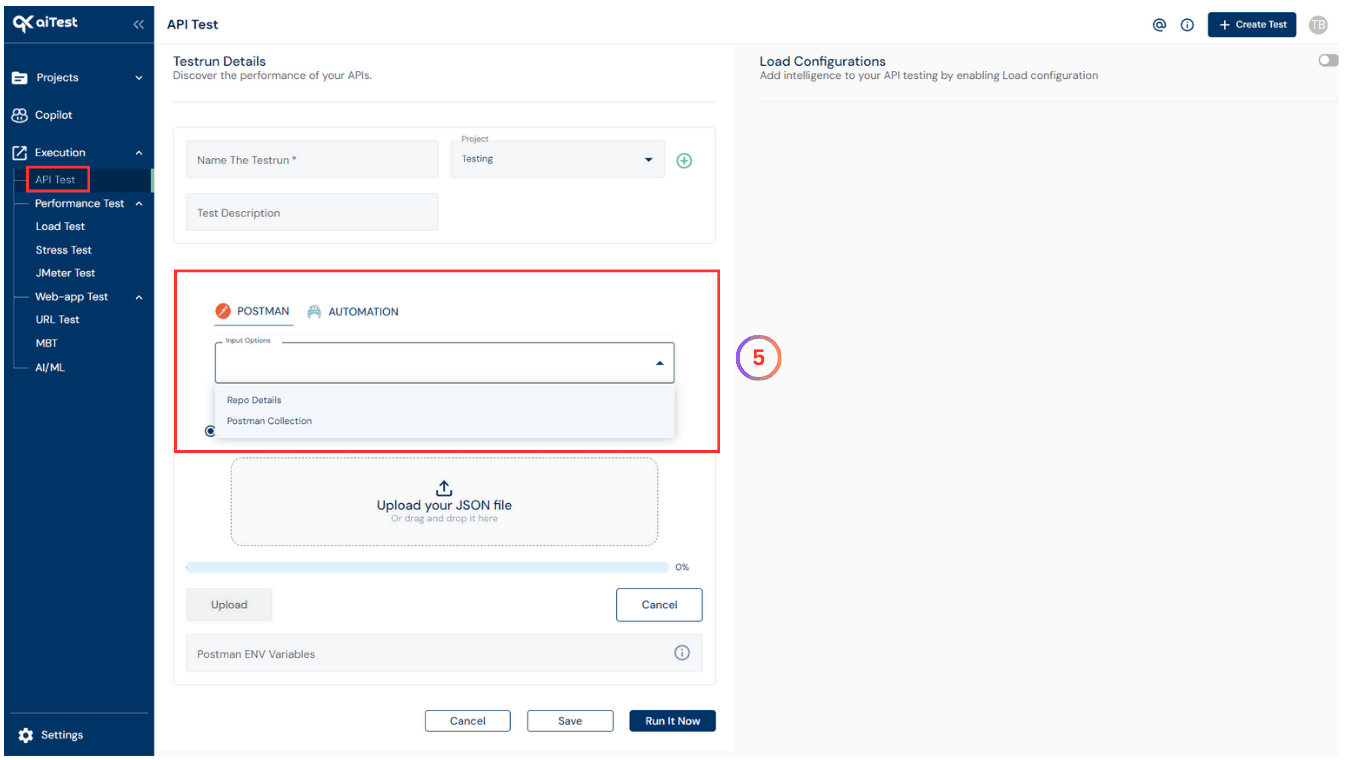
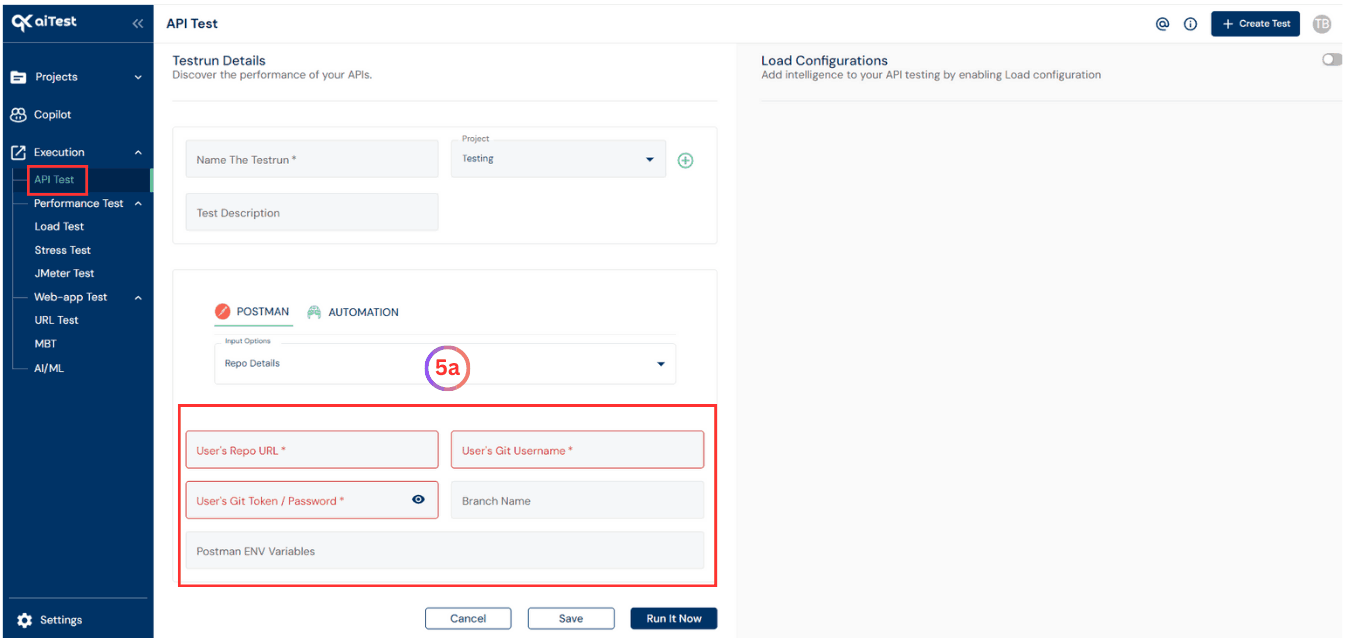
- a)If you choose POSTMAN with Input Options as Repo Details: Provide the Repo Details User’s Git Repository URL, User’s Git Username, User’s Git Token or Password,Branch Name and Postman ENV Variables.
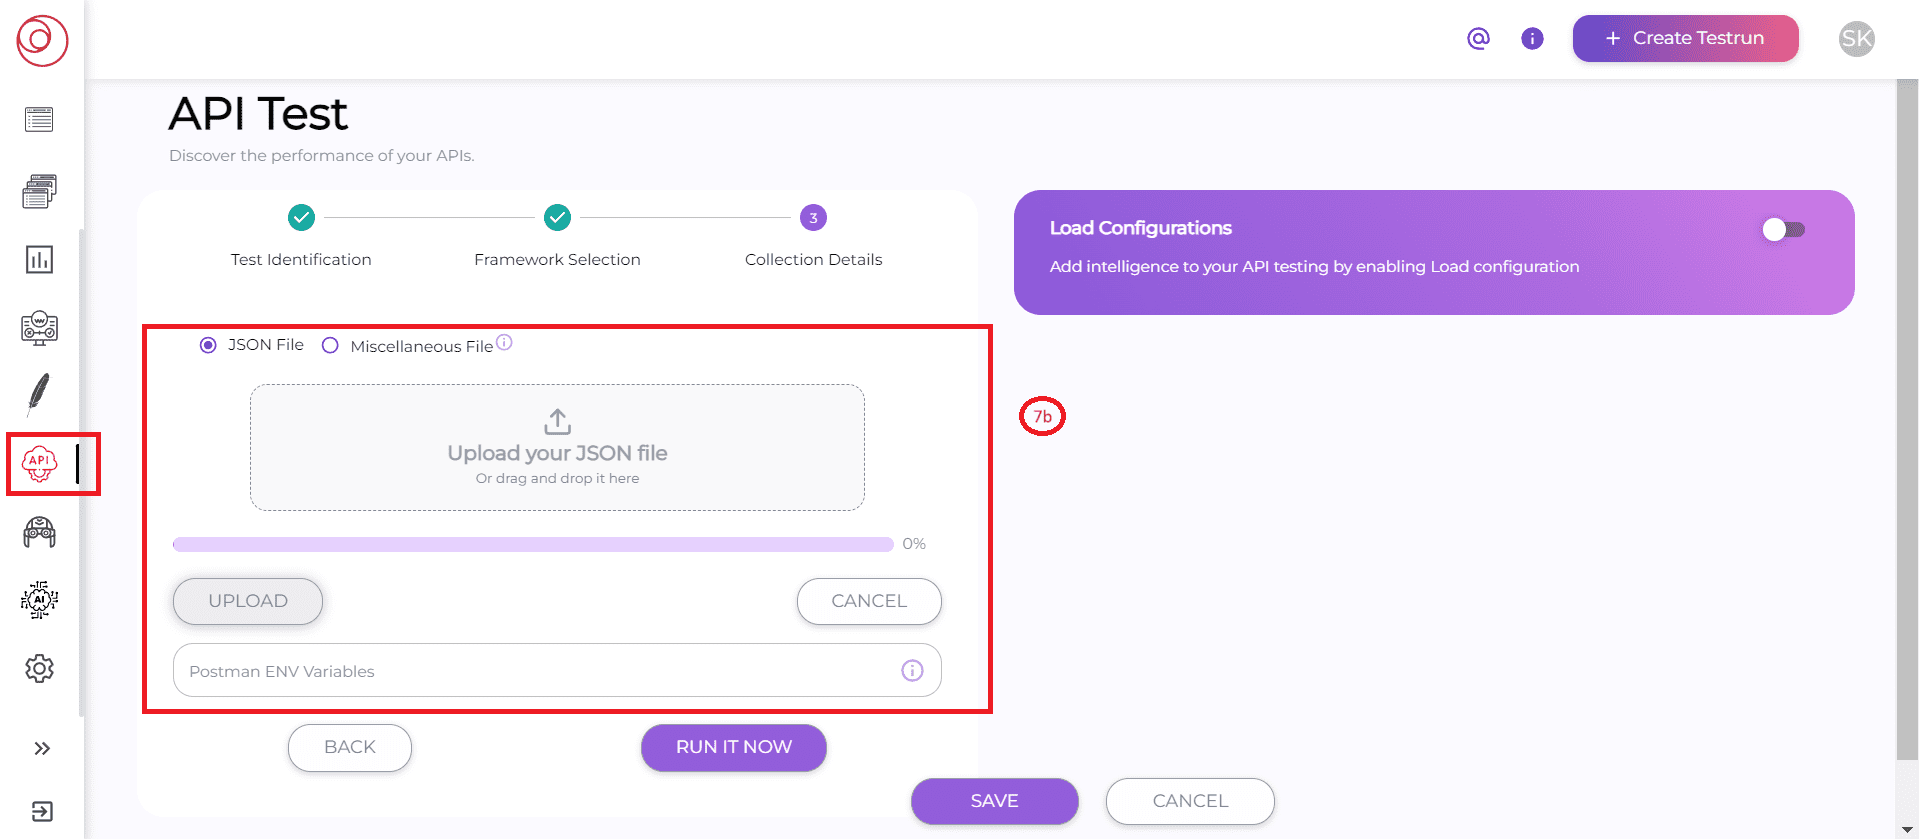
- b)If you choose POSTMAN with Input Options as Postman Collection you will need to upload your JSON or Miscellaneous File and Postman ENV Variables if required and enter collection file name with .json extension if you upload your Miscellaneous File.
- c)If you choose AUTOMATION with Input Options as Automation Details you will need to upload your Automation file and Test Run Command as
mvn test.
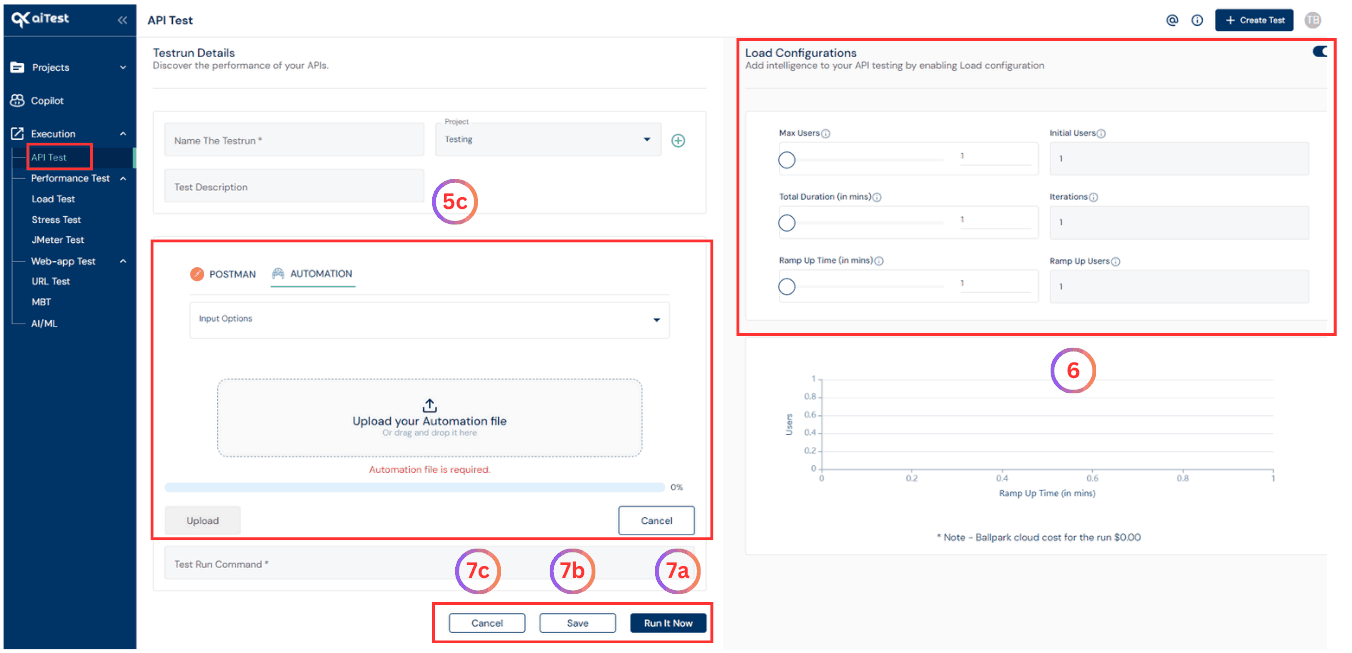
- On the right-hand side you can configure the Load Configurations such as
- a)Max Users: The total number of users you want to test for.
- b)Initial users: The initial number of users.
- c)Total Duration: Total time to run the test as per given users.
- d)Iterations: Iterations in load testing involve running multiple cycles of simulating user behavior.
- e)Ramp Up Time: The time after which you want to add more users.
- f)Ramp Up Users: The number of users to add after the ramp.
- Once you are done with the above steps you can do either of the following:
- a) Run It Now : Immediately run the collection file against the configuration.
- b) Save: Save the configuration for later run as draft testrun.
- c) Cancel: Reset and go back to dashboard page.
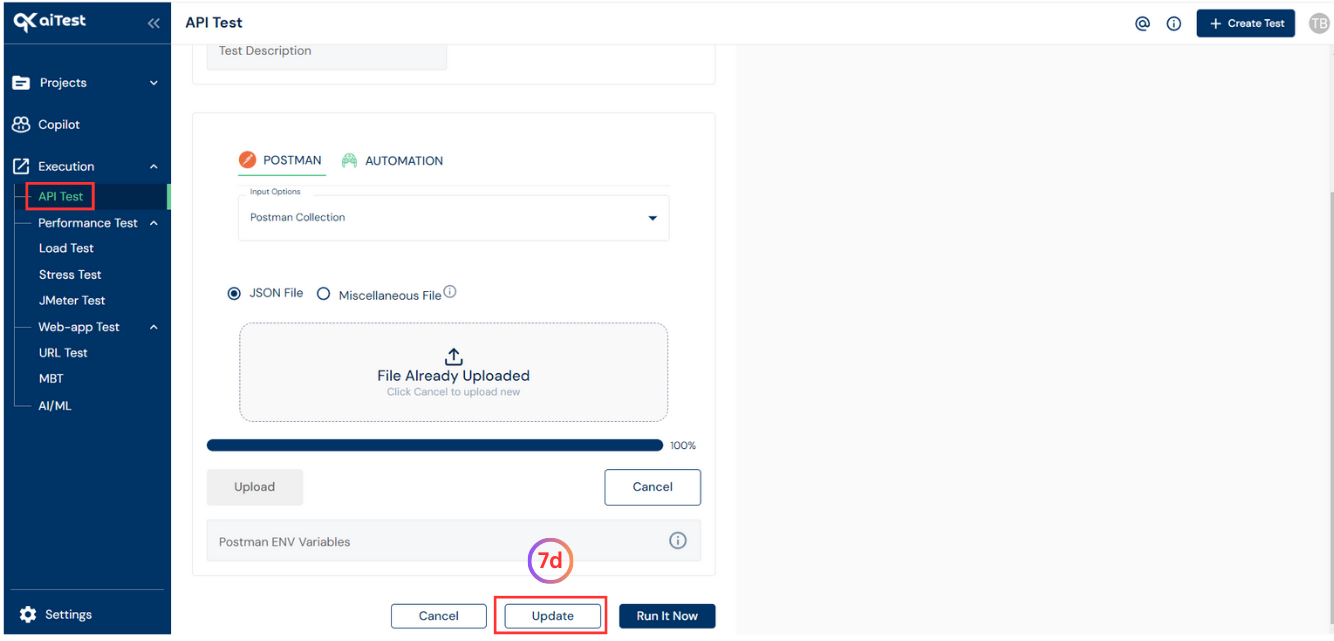
- d) Update: Update the configurations of the saved draft testrun.
Run Analysis
After the testrun is completed, you can access the Run Analysis to review the results.
Here’s how:
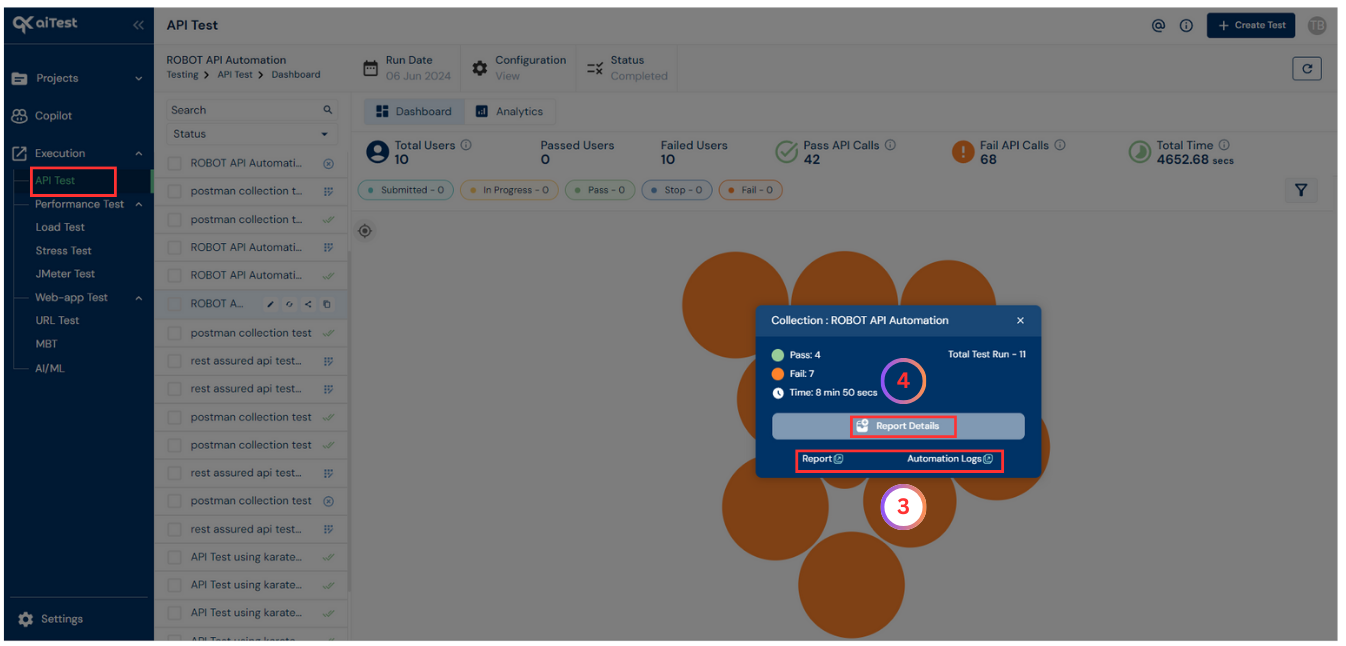
- Go to the API Test dashboard to see an overview of the testrun results.
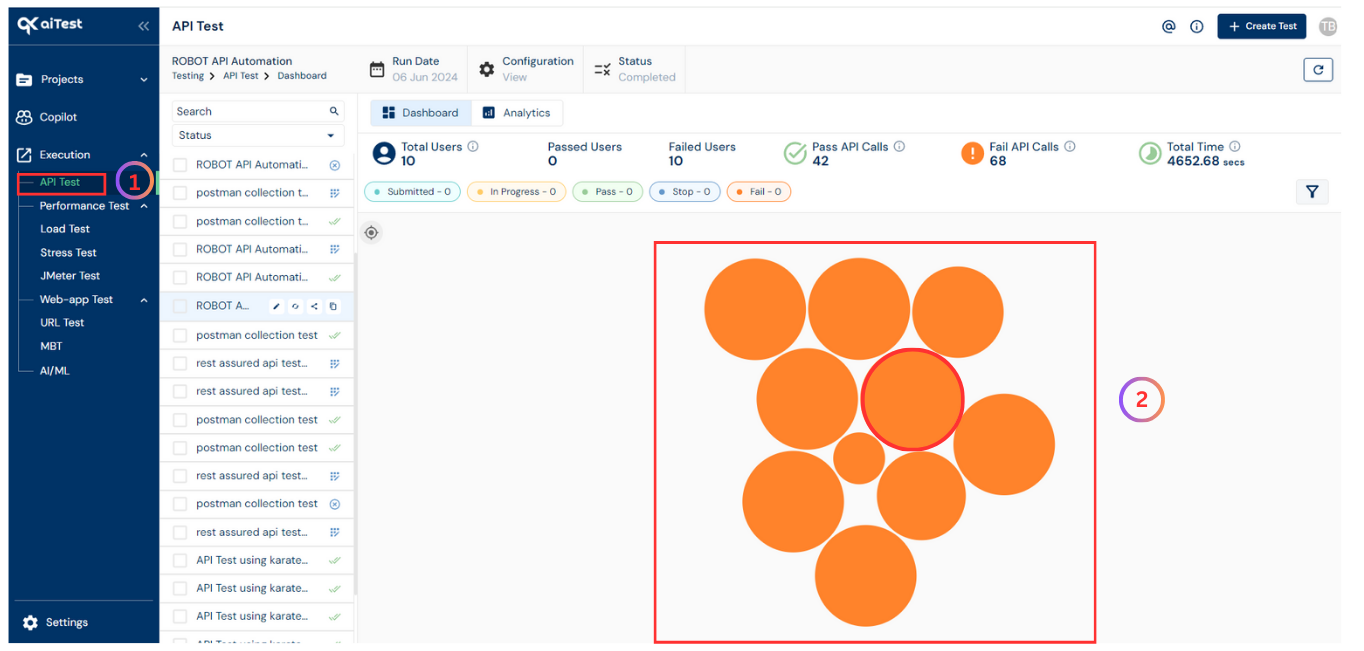
- Once you have reached the API Test dashboard page of aiTest, For more detailed information, click on the
Bubble associated with the completed testrun. You’ll find options to view Automation Logs and Report Details.
- Click on
Automation Logs to view detailed logs and any potential issues encountered during the test.
- To access the Test Report, click on the
Report Details button.
Questions answered
- How to use aiTest for Running Postman Collection with Desired Load?